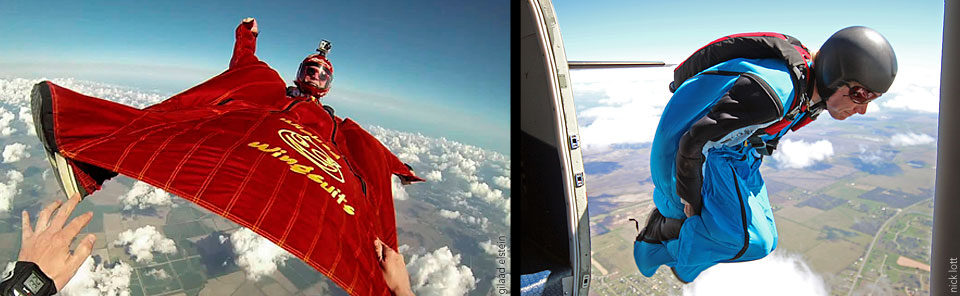
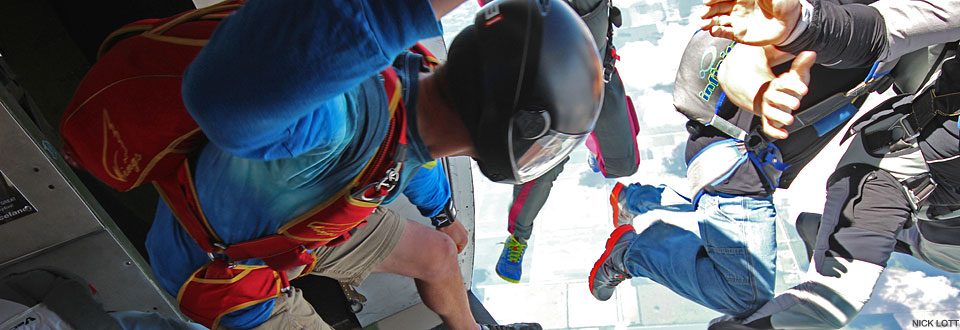
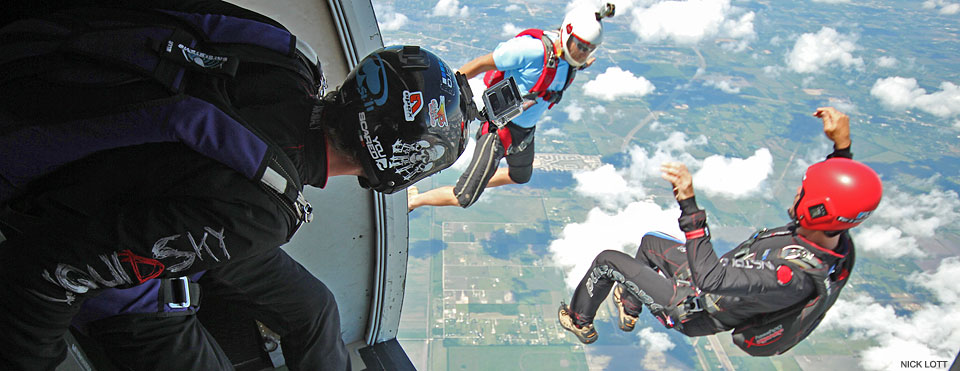
Wingsuit jumps carry many of the same risks as tracking/angle flying because of the horizontal movement component. They can also pose a risk to later-dropping aircraft because of the extremely slow fall rate. They can pose challenges when dealing with malfunctions as well, because of the limited mobility many suits allow the jumper before wings are released.
- These dives have a higher chance of landing off the DZ. Also, since you’ll open away from the usual jump run, we may not see you if you land out or have a malfunction. Don’t expect a ride if you land out; we’ll do our best to get you if we see you, but assume you’re on your own. If you have a cutaway, note where you opened so we can help you find your main. Identify an appropriate alternate landing area right after opening and fly conservatively to it, then make the phone calls described below.
- Each jumper should carry a mobile phone in a secure pocket, and program the following three numbers into it: Manifest (770-748-2200), ICE or In Case of Emergency number (family/responsible person for us to contact in case you are hurt), and the jump organizer. Call 911 first if you land out and are badly hurt, and call us second. Call us also if you land out but are unhurt to let us know you are OK and if you need a ride. Also call your jump’s organizer with the same information.
- We highly recommend AADs for all skydives.
Experience Suggested Requirements
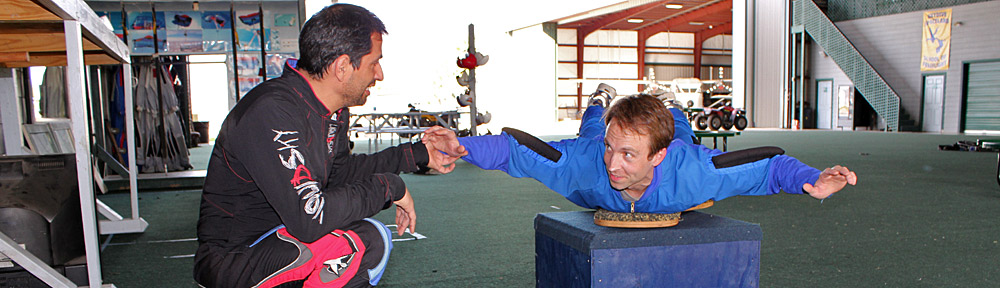
- 200 jumps within the last year, or 500+ jumps total. If you are not an experienced wingsuit flyer, your first 10 wingsuit jumps here should be under the supervision of a wingsuit instructor.
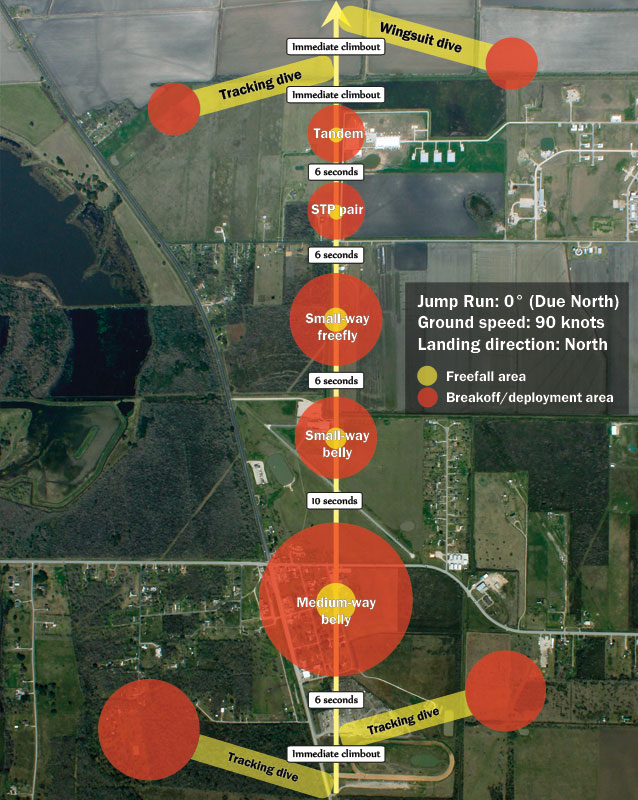
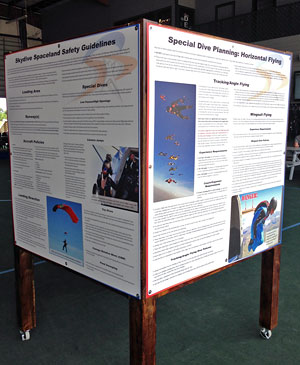
Wingsuit Dive Policies
- Get a briefing from a staff wingsuiter before making a wingsuit jump here. You will then receive a tag for your rig; otherwise, the loader will not allow you to board with a wingsuit.
- Always tell manifest if you are making a wingsuit jump so we can notify the loader and pilot. If you don’t declare your intentions with manifest, the increased last-minute load organizing may result in you missing the load.
- It is your responsibility to determine if the rest of the load is compatible with your jump. If there are already multiple horizontal skydiving groups planned, you may be assigned to a different load.
- Know where wingsuiters are assigned to fly each day you jump a wingsuit and stay in that area to avoid traffic with aircraft and other groups.
- It is your responsibility to plan each jump in a way that will keep you away from others and let you land on the drop zone. Check this board and/or weather websites for current wind conditions and use this information to plan where you must open to land on the drop zone, then make a flight plan that will take you to this opening area without crossing the normal jump run or approaching any other high canopies, trackers, etc. Consider that 180° second passes may occur and keep your flight plan clear of this as well.
- Do not ask the pilot for a variation from the normal jump run. If you would like a different jump run, ask the drop zone manager and if the new jump run is approved, he’ll communicate with the pilot. You should verify that the pilot is briefed when boarding.
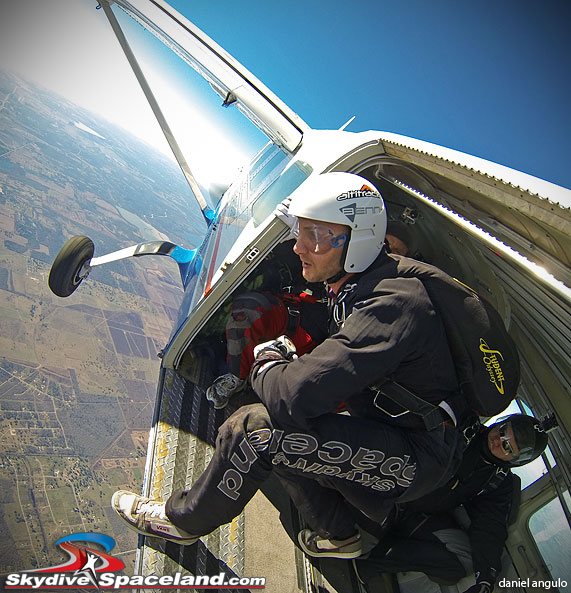
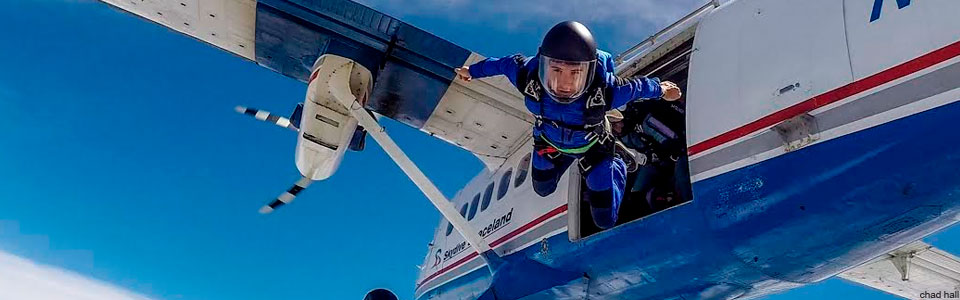
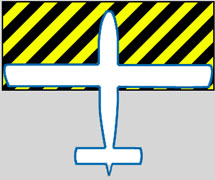
- Before exiting, ensure the plane’s wings, nose, and tail are level and the green light is on. Do not exit linked with another jumper.
- On exiting the aircraft, keep all wings collapsed for at least three (3) seconds to avoid striking the tail of the aircraft.
- DO NOT attempt to chase or fly in formation with the descending aircraft.
- Flying past or opening close to tandems or other groups, or crossing back and forth over jump run, will result in immediate and prolonged grounding.

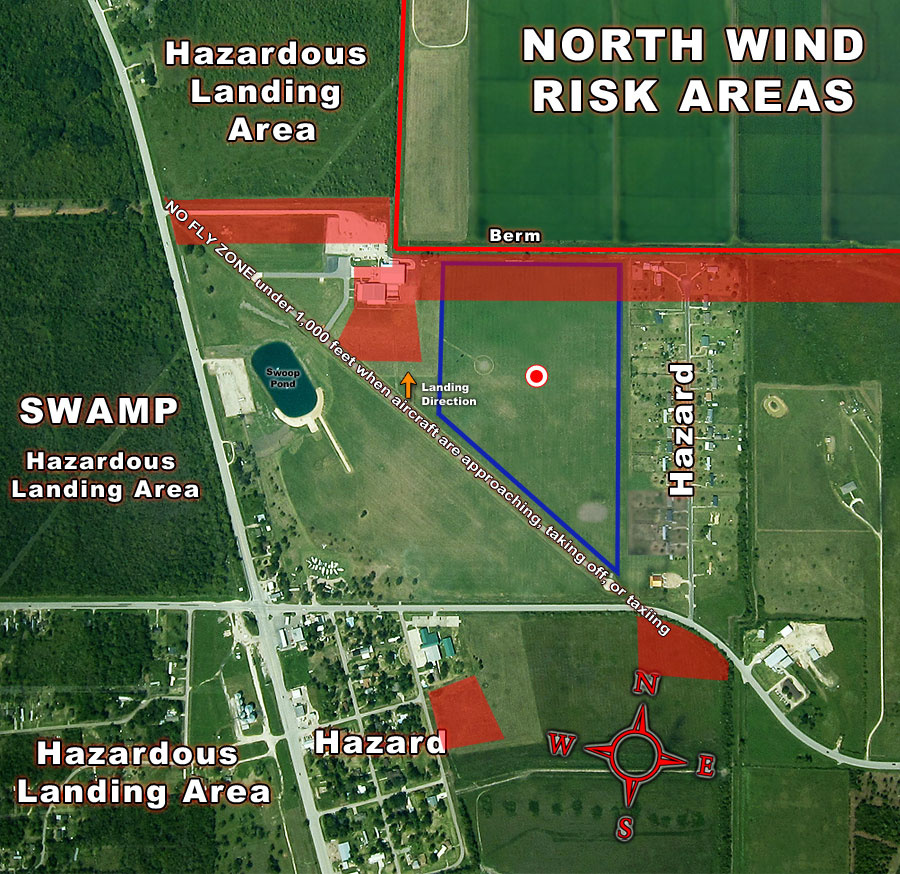
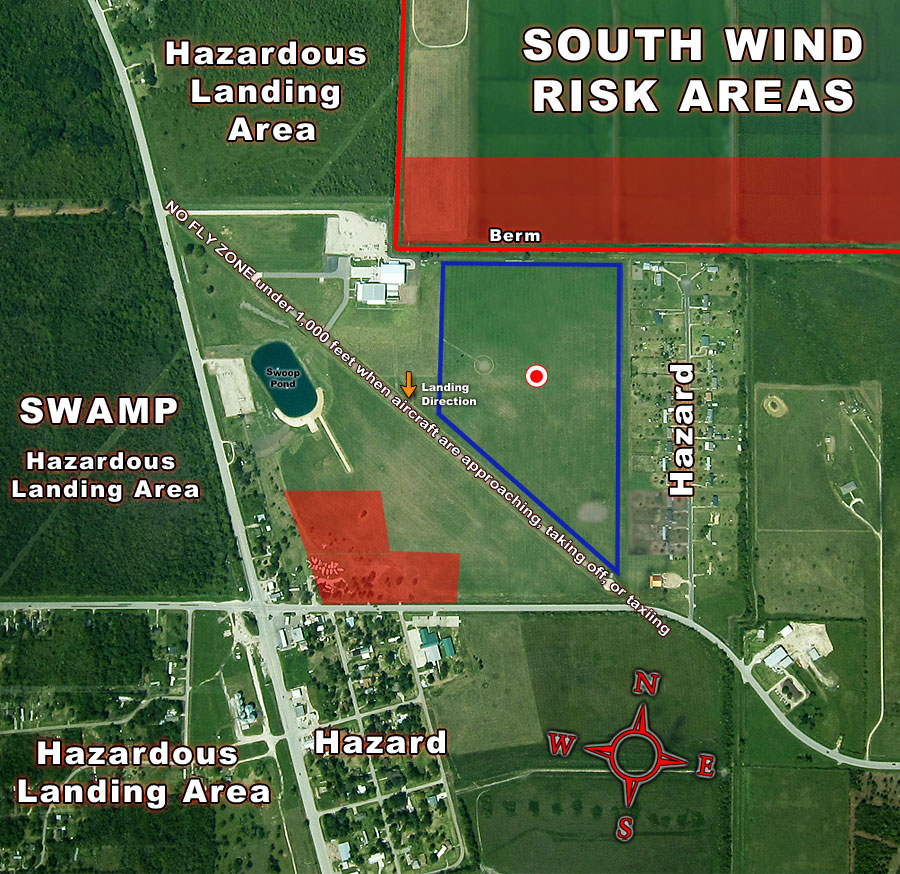
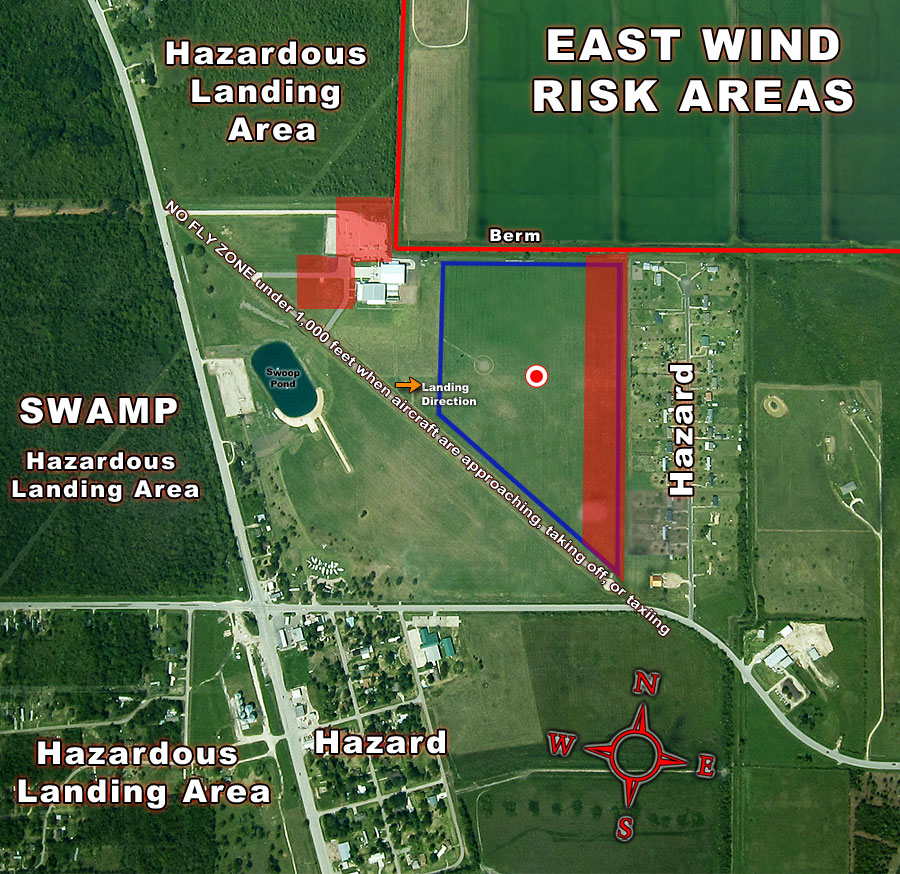
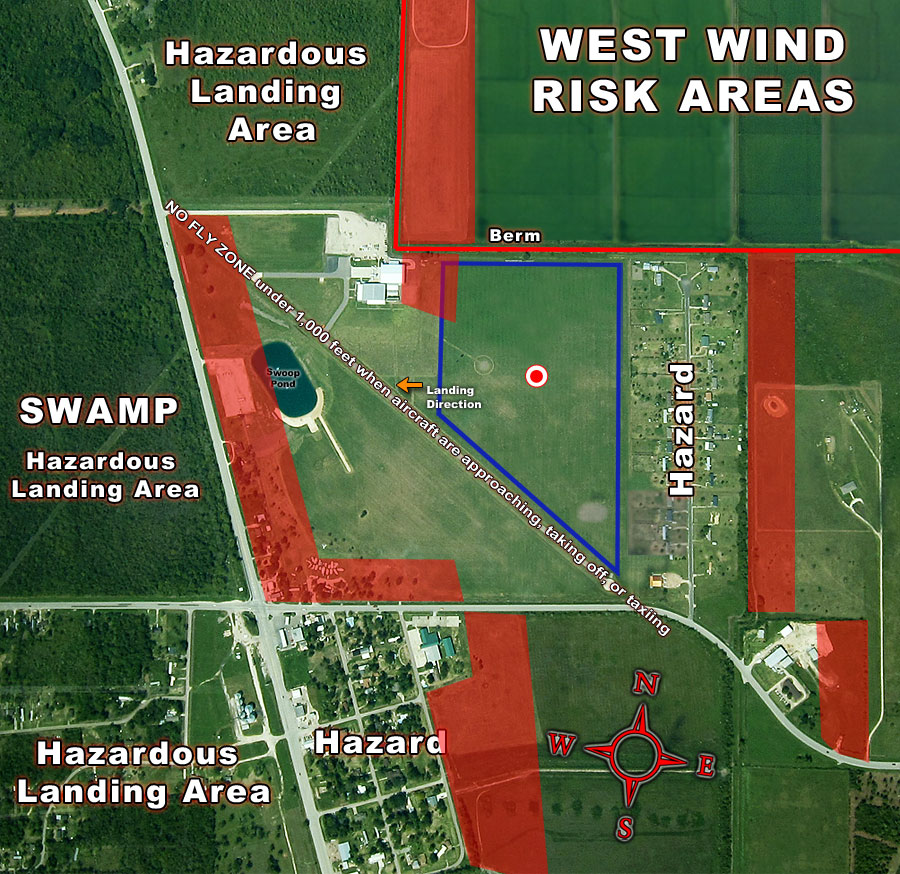


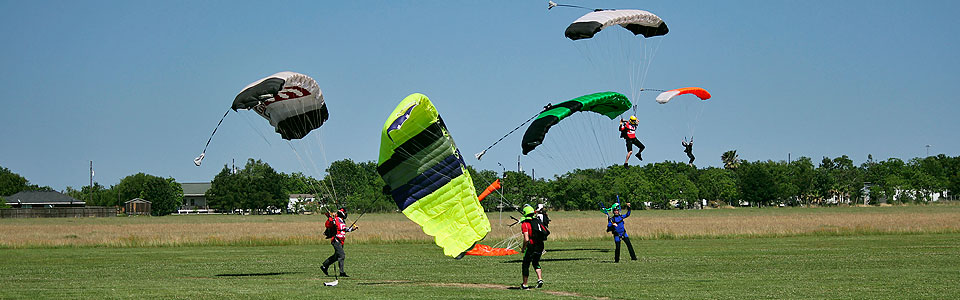
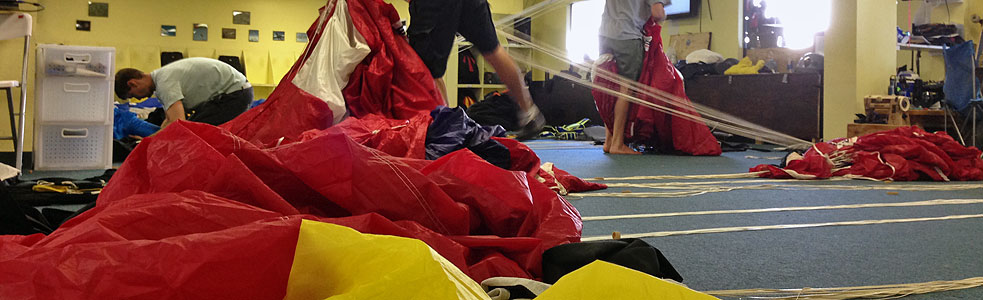
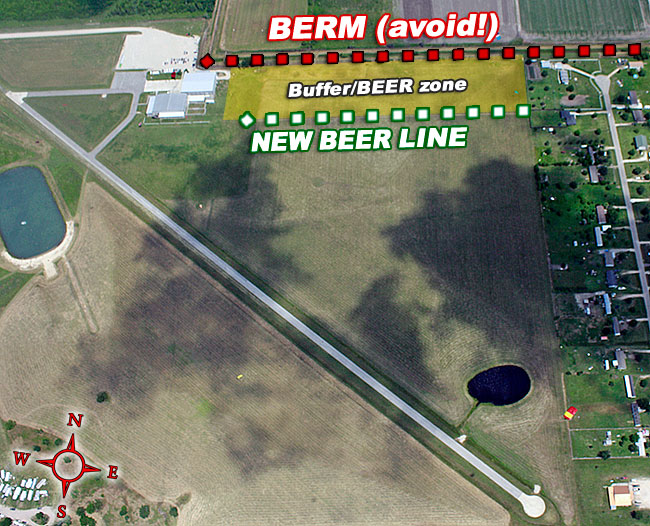
 One of the best things about skydiving today compared to some decades past is that we jump steerable parachutes. We have the ability to change our flight paths and land on target, which makes it a lot easier for us to land near the hangar and make lots of jumps in a day without quite the cardio workout of walking in from far-flung fields.